There are many proverbs such as ‘Prevention is better than cure’ and a whole lot of quotes regarding health is available on the internet. But there are times when you think is 24 hours enough for a day? In similar times, you do not think about your health and giving exercise to all parts of the body. Last of all, you would have heard but forgotten the golden statement, ‘if you exercise for forty minutes and meditate for twenty minutes, the next 23 hours the body and mind will take care of you.’ In this article on Top 20 minute exercises for every working professional – the right pattern of doing the steps and proper breathing can give you the same vigor to continue the day-to-day activities.
The exercises, if done in the morning before sunrise and before having breakfast can give the maximum effects. However, ensure that you consult with the doctor in case you have undergone surgery before doing tummy exercises. Get a training from your personal trainer. It will help you to learn the exercise in a perfect way. Also drink half a glass of warm water before commencing the exercise. Start the exercise 15 minutes after drinking the water.
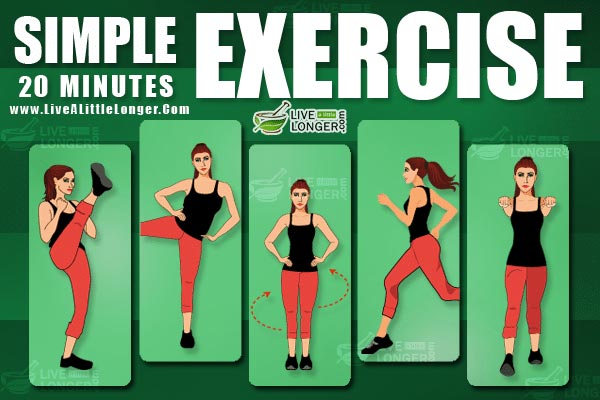
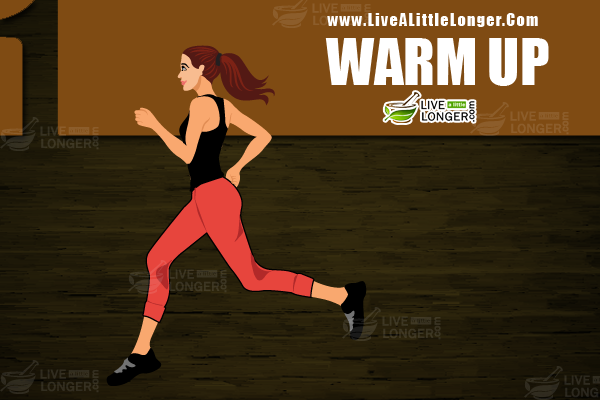
Ensure that you give the ‘warm up’ option to your body before starting the exercises.
The warm up option can be done for three minutes. You can jog for three minutes thereby making every muscle in the body ready for exercise.
Then we move on the head part.
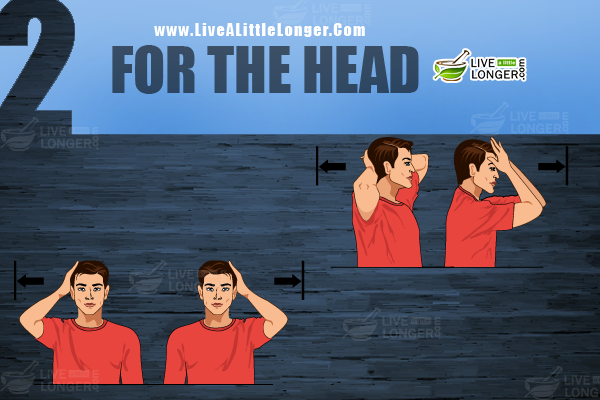
Head Exercises
Place the left hand on the side of the head. Now start to exert pressure on the hand using the head. The hand should prevent the head from moving sideways. The muscles on the side of the face will be exercised by this method.
Similarly, you can keep hands behind the head, and exert pressure on the hands. This will enable the back of the head muscles to become strong. Likewise, you can also perform the same process keeping the hands in front of the head.
Most Important: When you are doing any exercise, breathing is very important. In this case, withdraw breath when you are exerting pressure on the hand and release it when you come back to the normal position.
Eyes
The eyes are one of the major sensory organs. It is essential that they be exercised at least once a day.Your eyes needs to relax and the muscles behind them should be at ease often or at least every now and then when you are in your work. Go out, see the sky, the greens and relax yourself instead of staring in one place for so long. Don’t forget to blink now and then as you might forget to do it if you are so in to your screen. Being in the same position can makes the eye muscles sore and will cause a strain on the optic nerves if you’re continuously in front of the digital screens. Eyes need breaks too.
In recent times, computer work has become the forte and sitting on a desk with the computer and staring at the monitor non-stop except for breaks will put pressure on the eyes.
Four types of exercises:
Exercise 1
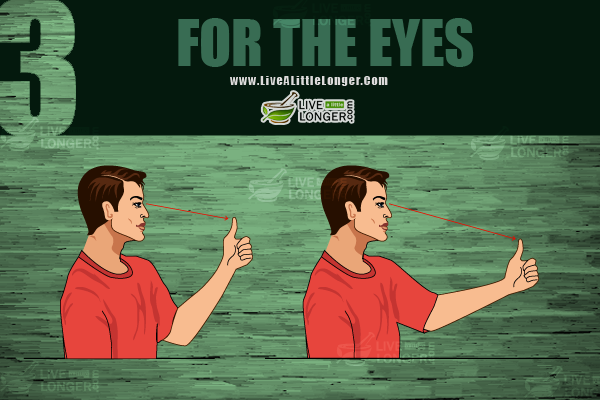
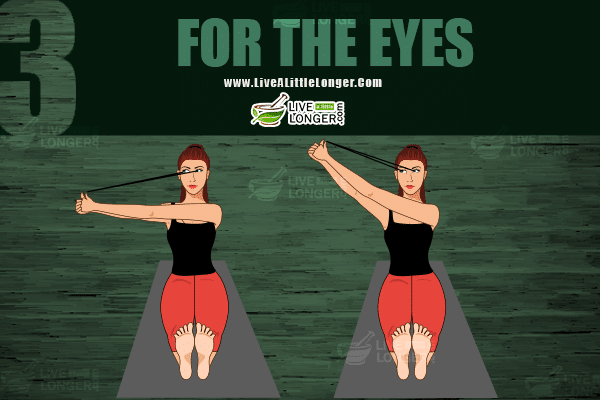
- You can bend your elbow with the raised thumb.
- Extend the elbow with the same posture and do not let your gaze wander off.
Exercise 2
- You can keep the thumb raised and move your eyes along with the thumb. You can either do this exercise sitting on a chair or on the mat.
- After doing the exercise on the left hand side, you can do the same on the opposite side also.
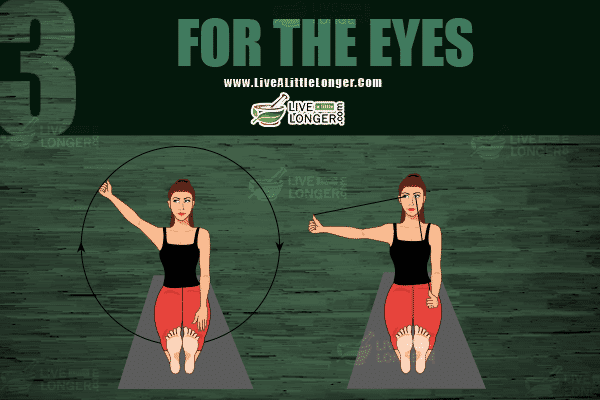
Exercise 3
- You can also rotate the thumb all the while keeping your gaze on the thumb.
These exercises are important as you tend to look at the monitor with a steady gaze and the distance will also remain same.
Neck Exercises
Similar to the eyes, the neck also remains in a static position while doing work.The work nowadays can get you tied to your digital screens for so long that your neck will scream for some soothing relaxation. A relaxed simple neck exercises will help in relieving the stress off the spine and the small vertebrae on your neck. Make sure that you don’t put yourself in to position where the neck blatantly shows so much discomfort through pain or till it gets to a headache/back pain. Act before that and give the neck the ease it needs through simple exercises.
Important: Breathing
Types of neck exercises:
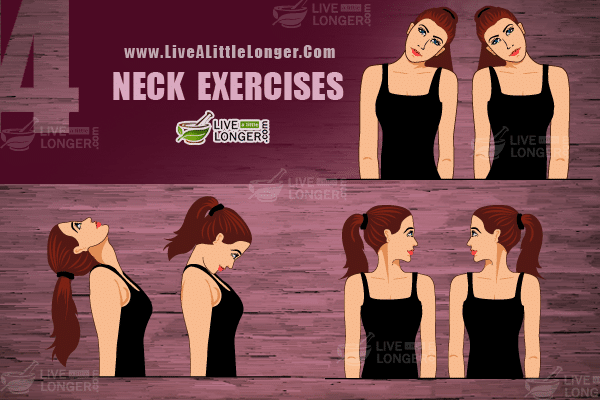
- You can tilt the neck to touch the shoulder on the left and right side. Hold breath when your head is going down and release it when you come to the normal position.
- Similarly, lift the neck completely upwards and then downwards. Hold your breath when you are looking up and release it as your head comes down.
- Move your head to the left side and then to the right side. You can hold breath when your head moves to the left side and then release as you move to the right side. You can repeat the same on the opposite side.
Finger Exercises
Sometimes your fingers won’t behave like they should and can end up becoming stiff or swollen or get in to a sort of numbness or can even cause hand pain. With the help of right exercises, your fingers will be back to work normal in no time.
Exercise 1
In any kind of working environment, the hands and fingers are very important. So, it is essential that exercises have to be given to the fingers so that the blood circulation is proper.
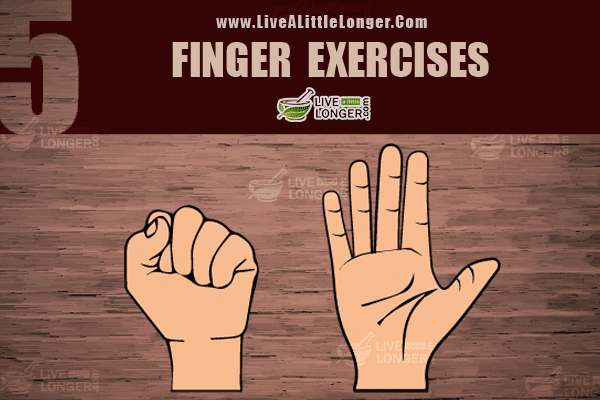
Clench the fingers properly, also hold your breath for five seconds and then release the fingers along with breath.
Do these exercises on both hands.
Exercise 2
When you type on the keyboard or laptop, the fingers are kept in the same position as well as the hand.
These exercises will save you from the carpel tunnel syndrome.
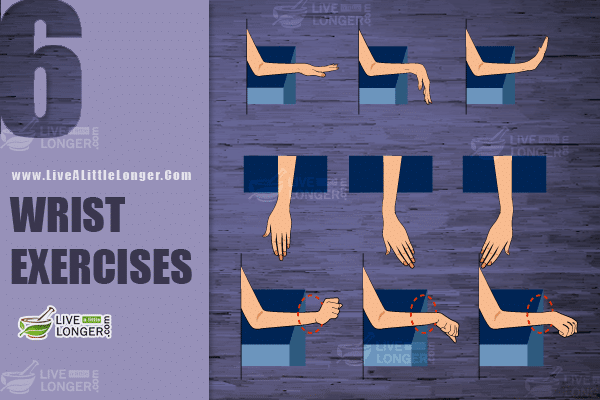
- Keep the elbow on the table with the fingers stretched. Now fold the wrist so that the fingers point downwards. Release the breath and when the fingers extend upwards, hold the breath. Do this exercise five times.
- The fingers and wrist when stretched can be moved leftwards and rightwards ten times. The breathing pattern can be similar as explained in the previous point.
- The wrist is the most important part in the hand. You can hold your breath when you rotate the fingers in the clockwise direction and release when doing this exercise in the opposite direction.
Elbow Exercise
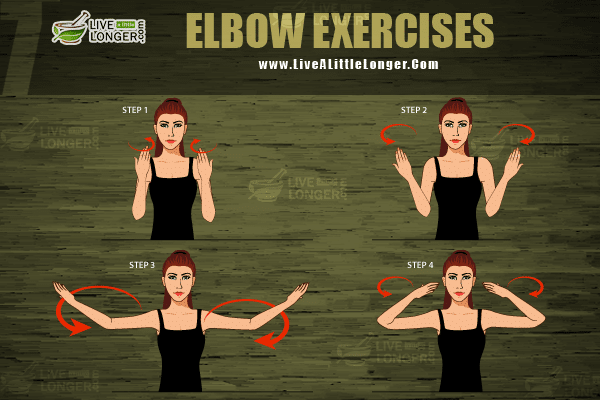
Fold the elbow and rotate it clockwise five times. Do the same in the anticlockwise direction.
Ensure you hold the breath in the starting point and release it as you near the same point.
Shoulder Exercises
Exercise 1
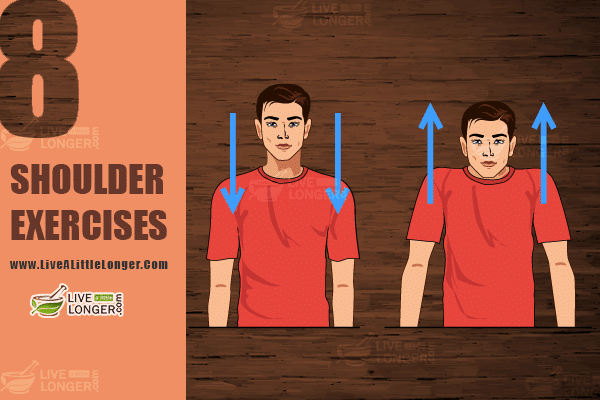
Lift both the shoulders up for two seconds while holding the breath.
Leave the breath as the shoulder comes down.
Exercise 2
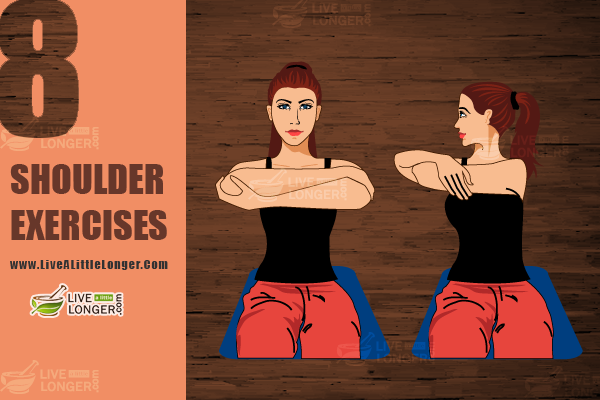
Fold the elbows and hold at chest position. Withdraw your breath.
Leave the breath as you move your shoulders in the left direction.
Repeat the same for the right direction.
Note: You can do any one of these exercises. To get maximum benefits, if you have valuable time, do the entire set.
Exercise 3
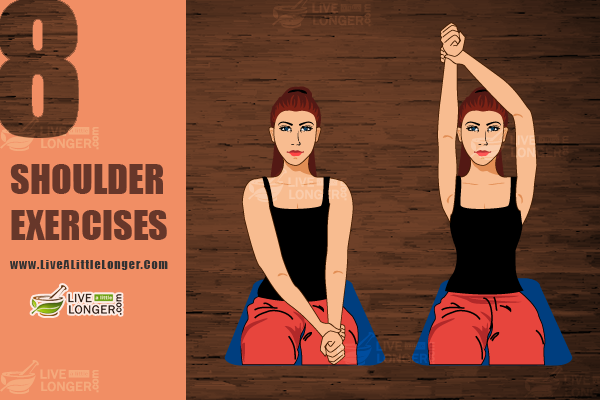
Sit down on a chair and extend your left hand. Hold the wrist of the left hand by the right hand and withdraw the breath.
Leave the breath as you lift the left hand.
You can perform the same exercise on the right hand.
Chest Exercises
Exercise 1
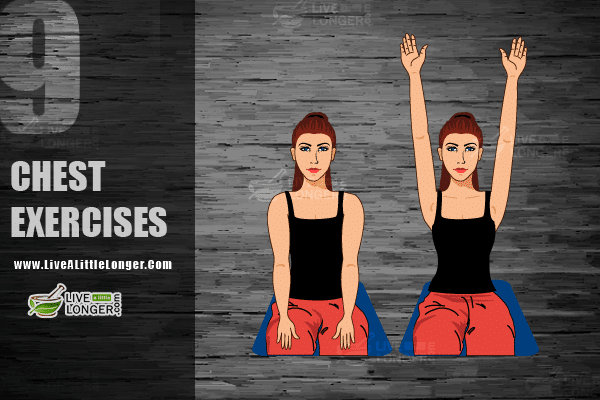
Since you are sitting in a chair, touch the knees with your hand. Withdraw your breath.
Now leave the breath as you lift both the hands up.
Exercise 2
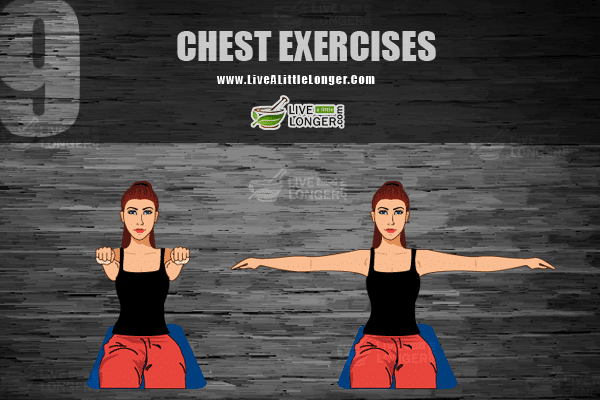
Clench your fists and hold them straight to the chest by extending your hand. Withdraw the breath.
Now leave the breath as you extend the hands parallel as shown in the figure.
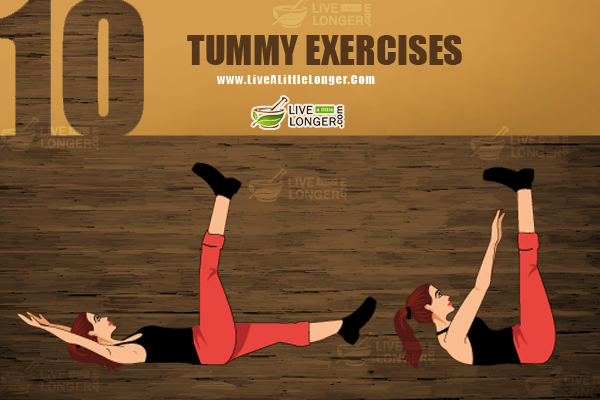
Tummy Exercises
Exercise 1
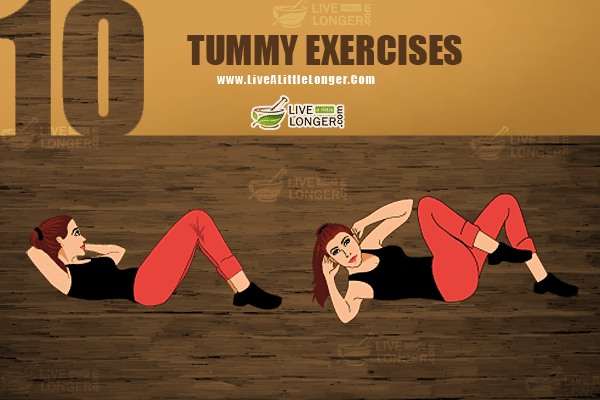
Lie down on your back, and fold your knees. Withdraw the right knee and the left hand elbow should touch it. Remember, that you should hold the breath when your back touches the floor and leave it as you come up.
Exercise 2
Extend your hands and legs. Hold the breath.
Now leave the breath and you make the legs come parallel to the hip, and touch the hands to the knees.
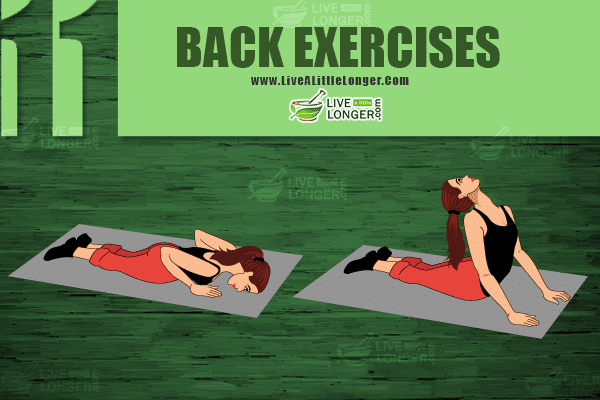
Back Exercises
Exercise 1
Lie down on the floor with your tummy touching the ground. Ensure you use a matt and do not lie on the ground.
Let your arms be near the chest.
Hold your breath and release it when you make the upper portion of the body move up as in the figure.
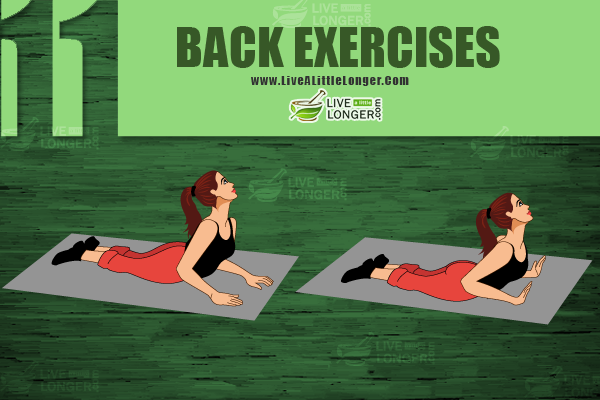
Exercise 2
You will do this exercise in the similar fashion except that you lift the wrist and the fingers also above.
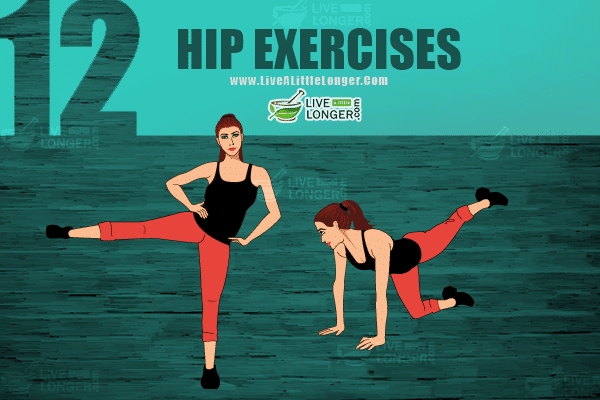
Hip Exercises
Exercise 1
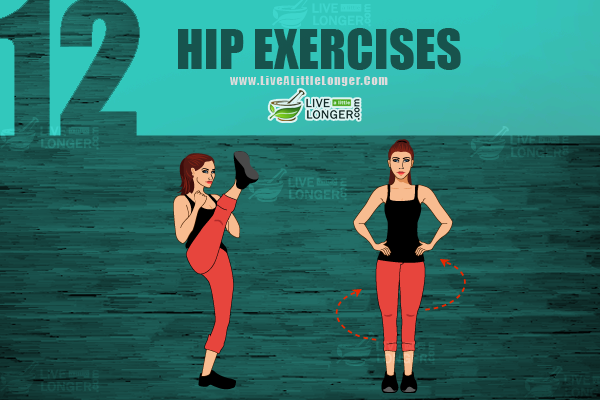
Stand on your legs and keep the hands on the hip. Now hold your breath.
Extend the right leg sideways as you leave the breath.
Do it in the similar way.
Exercise 2
Keep your hands on the floor and fold your knees. Hold your breath.
Release the breath as you ‘push’ the left leg making it parallel to the hip.
Repeat the same exercise with the right leg.
Exercise 3
Hold your hands near the chest. Withdraw your breath.
Now lift the right leg and make it come to your shoulder in a straight line. Most important, release the breath.
Knee Exercises
Exercise 1
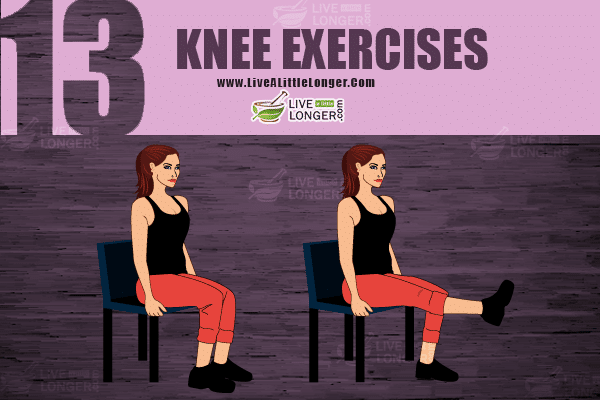
Sit down on a chair and hold your hands near the thighs. Withdraw your breath.
Release the breath as you bring the knee and ankle to the parallel position to the hip.
Exercise 2
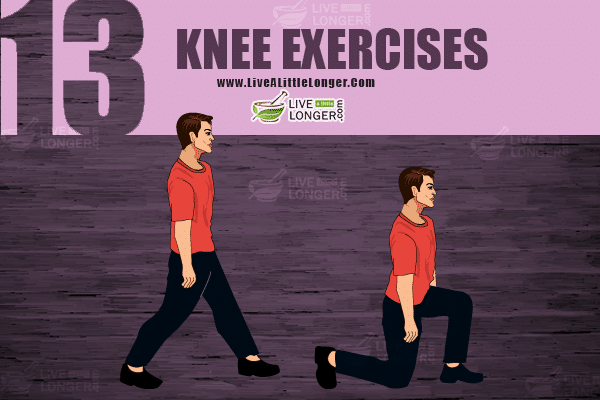
Stand on your legs. Let the right leg and the left leg be divided by a 45 angle degree. Withdraw your breath.
Release the breath as your left knee is bent and the right knee touches the floor.
Calf Exercises
Exercise 1
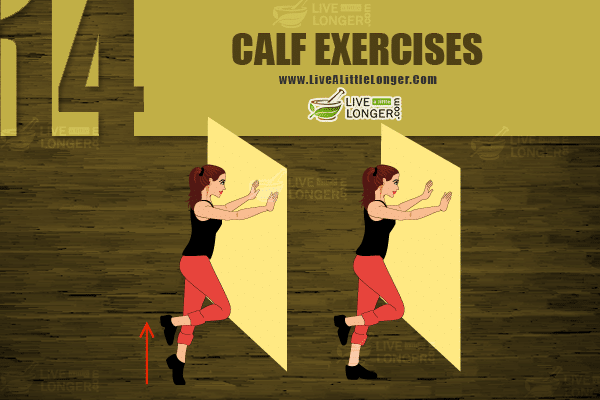
Stand near a wall and place your entire body weight on the hands. Now fold the left knee. Hold your breath as you stand near the wall and release it when you lift the knee. Remember the ankle and knee should be in a parallel position.
Exercise 2
Stand in the same position as in the previous exercise. Placing the entire weight on the legs, stand on the foot. Remember to release the breath as you lift the ankles up.
Ankle Exercises
Exercise 1
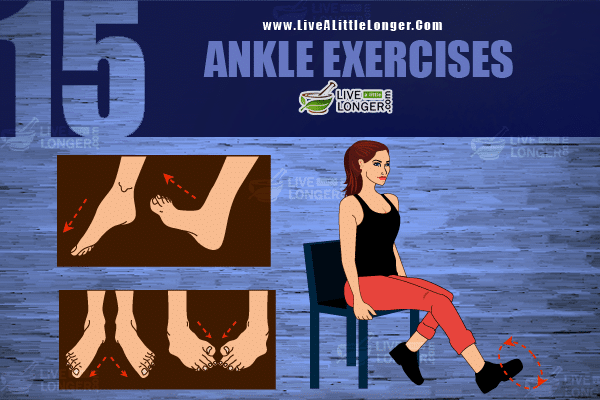
Sit on a chair and extend your legs diagonally. Hold your breath as you rotate the ankle clockwise. Release the breath when you do the same anti-clockwise.
Exercise 2
You can sit in the same posture with the legs situated one feet apart. Placing the ankles in stationary position, you can make them go sideways while releasing the breath. Now withdraw the breath as you make the toes touch each other.
Ankle strength is important because the moment you get pain in the calves, hip or back, you start to limp. Remember, these exercises will make the muscles flexible and strong. Having weak ankles, you will be prone to sprains.
Heel Exercises
Exercise 1
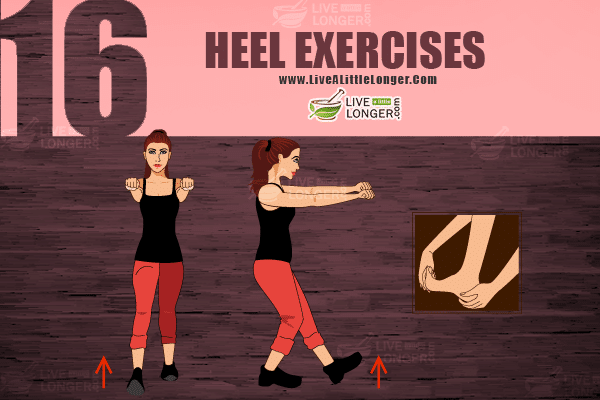
Stand on your legs. Let the right leg and the left leg be divided by a 45 angle degree. Withdraw your breath. Both the legs should be separated by at least three feet. Now extend your body to touch the wall. The ankles will get exercised.
Stretches
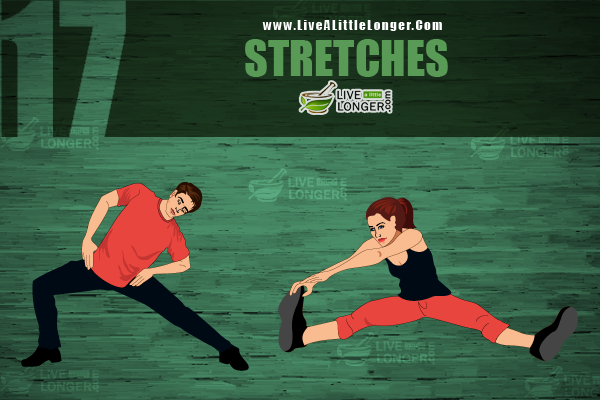
After completing the above mentioned exercises, you need to stretch yourself for one minute. Fold your knees and let it come in parallel with the hip. Now extend one leg while simultaneously moving the body in the same direction. While you are extending the body, release the breath.
You can sit down with the legs extending from the hip in opposite directions. Now let both the hands’ fingers touch the feet and release the breath.
We have enlisted in this article more exercises for a specific body part like the shoulders. You can either do one of the exercises, but it will be beneficial if you can complete all of them. Do these exercises but remember breathing is important. Oxygen has to be supplied to the muscles to get the maximum benefit.
